Sunday, February 27, 2011

Shooting for Stock Photography


Cuba Gallery: Indonesia Bali / summer / landscape / sky / clouds / wave / water / sunset / ocean / sea / photography / buildings by ►CubaGallery


Photo Credit: celtics baby clothes


A great way to earn money and learn a lot in the internet is participating in stock photography. Stock photography has been around for a while. And there are a lot of great stock sites that sell photographs for a reasonable price.

Just how and what should you shoot to be able to participate in stock photography?

Photographers say you should start with the concept. But the very first thing you should do is to know your equipment. I literally spent ten times more time trying to know how my camera works than thinking of something to shoot.

Stock photography is a very demanding industry. It's as close as you'll get to professional photography. It requires you to be able to produce images of the highest quality. That is because this industry is very competitive.

Try shooting the same subject with different settings. You should know how your camera reacts with different kinds of light. You should also know how it responds to different levels of illumination. Note the differences you see and keep them in mind.

Next you need a concept. Your images should present an idea, a thought or an expression. Consider a photograph of a man typing on a computer. What is he doing? Why is he typing? Is he working? Is he Blogging? Or just playing?

Designers buy stock images because of the concept they present - not because they look good. Stock photos are used in web sites, brochures, magazines, publications, advertisements, and almost anything that has a print.

So you need to have an image that has a concept that satisfies the needs of the would-be buyers of your pictures.

Then, you need a lot of light. Stock photos require that images have the right level of illumination and contrast. They need to be clear. If you can't afford a big set-up, you can always use desk lamps or even the sun.

You'll also need a computer and two kinds of programs: noise reduction tool and a photo editing application. Most stock photographs go through a noise reduction process. They also get a little tweaking in color, contrast and brightness.

Stock photographs need to be as close to perfect as possible. It's like what they say in the computer graphics industry: "it does not matter how you do it as long as you get the job done." Don't think that editing a photo in your pc is cheating. That only goes for journalism.

The next is pretty simple. You need a stock agency to upload your images to. Or you can showcase your work in your own site. Uploading in stock agencies is better. That is because you can find out where and how to improve. Use their powerful community to find out your weakness and strengths as a photographer.

Then when you have all this, what you need to do next is to be consistent and improve and improve and improve. You need to keep up with the ever demanding industries. If you don't, you'll get left behind.


Using Depth of Field for Photography


Photography Desk by billread


photo source


It's one of the greatest tools available to photographers, it's easy to use, and yet it's among the least known and used abilities of a camera today. Pro photographers have used it for decades, but the amateur can use these same techniques without paying the professional price. It's called depth of field, and it's accessed through the use of the aperture.

The aperture, simply put, is the hole that light comes through in your camera. Light passes through the front of the lens, through a series of glass pieces, through a hole at the back of the lens, and into the camera. The aperture is the hole in the back of the lens, and you get to control this vital part of the camera, if you decide to want to bump up your pictures. You can place the camera on auto, and the camera will adjust its aperture, shutter and more to the situation it sees. By placing the camera in more manual modes, you take on powerful and personal control, and YOU get to decide what you want to create with your photographs.

An important factor here is lighting. Any photography relies heavily on the lighting that you are using, whether it be from the natural, ambient light around you, or artificial light, like a strobe or other flash unit. Especially while using natural light, it will be important to use a tripod to keep the camera steady while shooting. If you are shooting on a cloudy day, without much light, then the camera must compensate for less light by having a longer shutter speed, which it will do automatically in the mode I'll be explaining in a moment. A longer shutter speed means the camera won't be able to have a clearly focused picture without the use of the tripod.

Depth of field simply means the area of focus, or the area in the picture that is in focus might be a more accurate term. Photography is a two dimensional medium, having height and width, but it lacks depth, the third dimension. Your photography can create the illusion of that depth through a few easy camera settings. You may be asking yourself, why would I want to create the illusion of depth, and what is it good for? Part of the reason is to create a sense of emphasis. When you take a picture of a large area, with trees, birds, squirrels, people, rocks, etc, what is the thing or object that you are zeroing in on? Is there anything that you really want to emphasize to your viewer? If so, it's probably getting lost in the crowd of other things on the scene. The squirrels are so small you can barely see them, the people are walking their dogs, and the trees are swaying in the breeze. But what if you wanted to focus on the viewer on the flowers in the garden? When you create emphasis on an object, it strengthens your photo, and actually guides the eye of the viewer to that object. You could take pictures to create a story about that, as you can read in my article about photo stories. When you get in to take close-ups of the flowers is where the possibilities of great photography begin.

Emphasize the garden by focusing in on one or two flowers at a time. Grab a tripod, get down to eye level with them, and then get ready. Place your camera in a mode that allows you to change your aperture; the mode is usually called "A", or "AV" on some models. Film cameras can allow these changes too, on SLR models. They require you to simply change the f-stop manually on the aperture ring. On your digital camera, use your selector buttons to change your aperture. You'll see on your digital camera, most likely, a letter f, with the number on the readout on either the monitor, or the info panel on the top of the camera, or perhaps both areas. The f means f-stop, which is the name commonly used to describe the number of the aperture setting. The best way to emphasize a flower is to have only that flower in focus, and to have the rest out of focus. Change your aperture to a really low number, such as 2.8, 4, or 5.6. When the lens is at a low number like this, the lens hole is wide open, but it is creating a small area or depth of field; basically an inch or two will be in focus. Focus your camera, and shoot. Now, look at the camera, and look at your pictures. The one or two flowers should be in focus, but do you see how the background is fuzzy and out of focus? This is what is called a "shallow depth of field", and that comes from using a small number f-stop. That's because you've taken control of your camera, and changed the outcome! Because only the flower is in focus, and the rest is blurred out, you have guided your viewer to what YOU want to emphasize! You have used one of the most powerful tools available for a photographer to bring a new focus to your pictures. Try this with a lot of different scenes; look how the item is forced to really stand out for you because it's the only thing in focus.

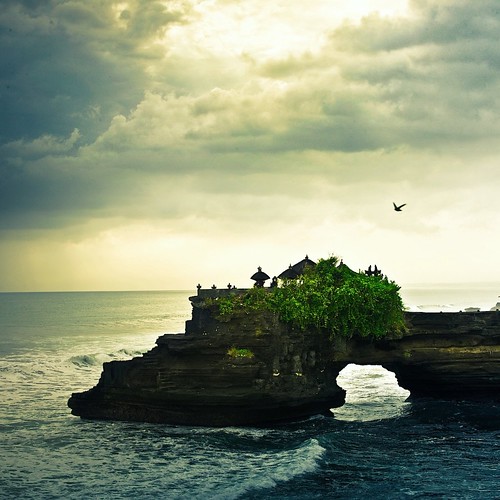
Now, on the opposite end of the spectrum are the pictures that have the entire photograph in focus; such as a lighthouse standing out from the beach, with horseshoe crab shells in the immediate foreground. This is also done by changing the depth of field of your camera. Here, you again change your aperture, but this time place it on a high number like 16, 22, 28, etc. This is to create a large depth of field by using a small hole in the back of the lens. Again, you must use a tripod to keep the camera steady. Take a picture with something in the near foreground, such as a rock or the crab shells, and then compose your picture with a mountain or some other object some distance away, focus, and shoot. Remember to use the rule of thirds here for additional emphasis. As you'll see, both areas should be in focus, again showing the third dimension and creating the illusion of depth. This is a large depth of field.

It's a little known tool in the photographer's toolbox, but almost any camera made in the past four years will have some sort of ability to work with depth of field, whether they have a point and shoot or DSLR. Every photographer, of every level, has the ability, through practice, to create beautiful photographs that can rival those of the pros, by using the tools available with every camera. Use the strength of depth of field when you create the third dimension in your photographs, and add a new and incredibly
powerful personal dimension to your photography.

Saturday, February 26, 2011

Budget Winter Wedding Photography Guide


Cuba Gallery: New Zealand / landscape / sky / clouds / grass / tree / house / farm / photography by ►CubaGallery


source,credit


Do-it-yourself wedding photography is an excellent way to save money, but it is important to plan the details. Chances are you probably know a few photography buffs who are willing to help with your wedding photos. Use this guide to make the most of their skills and generosity to get beautiful wedding pictures.

1. Recruit multiple friends or family members to help with the photographs.
Designating multiple people as photographer splits the workload and means the wedding pictures will reflect a variety of perspectives. Choose knowledgeable, reliable people who are experienced in digital photography.

2. Use a high quality camera.
Make sure the camera you choose is technologically capable of capturing your winter wedding memories. Varying lighting conditions and action scenes are no problem for a good digital camera.

3. Have backup batteries or a backup camera ready.
Be sure the camera you use is charged and have a backup battery or backup camera ready.

4. Bring extra memory cards.
With digital cameras, most people take a few photos then delete the bad ones. The quick pace of a wedding probably will not leave time to edit along the way. Besides, pictures that are out of focus or unusual often have a unique beauty that is not immediately apparent. Bring extra memory cards to avoid missing a good shot.

5. Be very clear about what you want.
Research online and browse friend's wedding albums to get an idea of the type of poses and moments you want to commemorate. Make a list to be absolutely certain each milestone is photographed.

6. Get a mix of candid and posed shots.
A variety of photos best captures the spirit of the day.

7. Plan for the weather.
Depending on the wedding location, winter weather may mean it is too frigid to venture outdoors for a photo session. Plan to take group shots of the bridal party and family members indoors.

8. Edit the photos.
Try cropping and adding different special effects. Sepia and black and white pictures take on an elegant, timeless quality.

9. Order quality photo prints.
Since you saved so much on the cost of a photographer, invest in prints that use high quality paper and ink.

10. Make a wedding album.
You can use traditional photo prints to make a wedding album, but digital photos give you more options. A variety of book options, including hardbound books and small flipbooks, are available online and in many drug and discount stores.

Whoever Said a Picture is Worth a Thousand Words Probably Didn't Use Positive Images Photography


Cuba Gallery: Interior / child / binoculars / portrait / photography by ►CubaGallery


credit


Well I've come to terms with the fact I'm no Denzel Washington... and I'm okay with that. All I really wanted to do was to take some good quality pictures I could use as profile headshots for my internet businesses and for my business cards, brochures, etc. This was important since I had a deadline coming up that I needed pictures for.

Based on my photography needs, I had wondered was there a photographer where the average looking person can go to get reasonably priced, almost "Star Quality" pictures taken. Also, I preferred that they were local too because I wanted a photographer that I could do business with again on future projects. Just imagine my delight when I found out that there was such a photographer located in Oakland at Positive Images Photography.

The owner is Gisele Bonds (no relation to Barry) and she not only consulted with me on the objectives of my project, she also happened to be a pleasure to talk to. She is very knowledgable. She definitely won points when she suggested that I go home to retrieve a few darker outfits to round out my photoshoot after I mistakenly arrived with all lighter colored outfits. She then explained why and how the darker colored outfits could be used to my advantage in the photoshoot.

As we took pictures she instructed me to pose at various angles and again she told me why those angles were important based on the numerous ways we discussed I could to utilize those pictures in my marketing mix. For instance, some of my pictures were taken with my business' branding in mind so that my company's logo or other images could be easily incorporated into those pictures. Nice!

For someone who's camera shy, I can honestly say I did enjoy Gisele's professionalism and creativity. After what felt to me like a thousand pictures and almost an eternity, we finally finished! At that point my mind started thinking, I hope these pictures look okay. I have to admit, I felt a little self-concious about the prospect of seeing the finished product because I have like many people, facial blemishes. When I mentioned this concern to Gisele she said not to worrry the pictures are going to look good.

Gisele invited me to come in and take a look at all the pictures we took and choose the ones I wanted. She gave me some positive feedback that was helpful and then I selected my favorites.

Later, when I received my Picture Disc I was happy to see that she was so right, my pictures did look good and my facial blemishes were gone... at least in my pictures! Interestingly, I'm told her specialty is working with high school aged students. Her studio is filled with with a plethora of graduation and prom pictures, etc.

She mentors students by providing intern opportunities at her studio and one of her past interns who is in college currently, still works at the studio which to me says alot about the kind of person Gisele is. I think that Positive Images Photography is aptly named and if you're looking for high quality photos, Gisele is the person you need to see. You may soon find that your pictures will be worth much more than a thousand words if you do!

Sunday, April 11, 2010


camera table by themexican


Asian female models wanted for still photography shoot in Bangkok. Looking for attractive Asian females from the age of 18 -35 for a still photography shoot on March 13th. Pictures will be used on a dating website that matches Western men with Asian woman. If you are dating or married to a Western man we would like to shoot couples pictures also!


Please send head shots to Tim.